
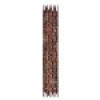
It all started with this die:

It is a Tim Holtz die from Sizzix. LOVE IT! LOVE IT!
BUT....
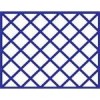
when you cut it out it is the martyr between the bricks which makes perfect sense but not so much when you try to use it... not to me anyway. The problem is, if you just lay it down on paper it will be higher than the actual brick, and that isn't "real"... not in the South anyway... here the brick sticks out further than the martyr. Problem... so, I look all over the web in search of something someone else might have done to fix the problem...nothing...not even on Tim's personal blog. Well yesterday I had a "suddenly, WELL DUH!" moment. I cut the die out of a Lean Cuisine box (have lots of those these days) and used it like you would use any stencil you buy. I don't have any of the paste that is made for 3-d embossing so I improvised with what I had: (a LOT of)
.jpg)
I slathered it on nice and thick with my finger, then instead of smoothing it out with something I patted it to make it rough, more brick like. Then because I have no patience I took my heat gun to it and that caused it to bubble up a bit, even better!
The two pictures below are just WEIRD because they make it look exactly opposite of what it actually is!
- The very top of the first picture is one I made with just paper and in this picture it actually looks that I would want it to look!...but not in real life.
- the middle is just the "stencil" right after I used the tile adhesive and it gives the appearance of raised bricks! NOT!...just the opposite
- the bottom was the PERFECT results but in the picture the bricks look recessed... ???

Closer:

Now.... how I used it and pictures that maybe show it a little bit better:


Well heck, not really ... you'll just have to take my word for it I guess, the bricks stick out about 1/8".
The solid strip of "concrete" across the top is actually 1 bump cut from a piece of corrugated paper and colored gray.
OH! and I colored the bricks with BIC permanent markers.
Products Used (with links to where to buy them):


Well, you NAILED this one. Thanks for the terrific idea. Interseting with the reverse visual on the bricks. I have photos of
ReplyDeletefootprints in the sand that appear that way. {I am sure a scientist somewhere knows why we see it that way}
Keep smiling and creating.
FAIRY!!! You are always such the encourager! I love it when you stop by and say hi!
ReplyDeleteI am always late in finding beautiful cards. Love this card and you really worked at getting the right look on bricks. Thanks for sharing.
ReplyDelete