I am so sorry for the TERRIBLE layout of this blog! It was actually pretty nice but one day everything went all amuck ??? No clue what happened....and since I don't really post here anymore I haven't bothered to figure it out. SORRY!!!

Thursday, August 6, 2015

NEW FONT!!! Sketchnoting Dingbats


I have a new font!  About time, right?!

This time it is all dingbats that are commonly used when sketchnoting in meetings, but i love to make lists with different bullets so these all make me very happy!  There are SEVENTY TWO different dingbats!  The beauty of having them in font form is that they can be easily resized and printed out to make a blank lists, or even printed onto label paper to make stickers ready for use anywhere.   If you have a Cricut or Silhouette it would be easy to cut the labels out ... that's what I plan to do as soon as I get done here.  I LOVE STICKERS!


 OU!  Just had a thought, I need a dingbat font for calendars (I LOVE stickers for calendars!)  

But first I'm going to make a font for Bible labels!

This font is ready for purchase HERE:  Buy now

Thursday, March 5, 2015

DIY Acrylic Binder Inserts ... Recycle!

A few days ago someone on Facebook asked where to get these:


I will admit that these strips are not that expensive but if you need them in a hurry and you have the supplies on hand .....  My first response was "make them yourself" and I explained how I would do it...today I decided to do a little tutorial.

1- find heavy plastic that is at least 9.5" long.  I have used transparencies in the past 


but today I wanted to recycle something...  I used this SPELLBINDERS packaging.


2- Cut the edges off so that you have only the two flat pieces


3- Stick Scor-Pal double stick tape on the very edge of one of the plastic sheets then cut it .75" away from the tape so you now have a strip of acrylic about 1.25" wide (if you use .5" wide Scor-pal tape.

...continue until you have all you need or you run out of packaging... I was able to get a total of six from this packaging...plus a couple more strips I can add .25" to.


4- Using a sheet of 3 hole punched paper mark your hole placement with a sharpie.


5- Punch the three holes... I used a heavy duty punch drill to punch through three pieces at a time, that way I only had to mark one.  You can probably tell from this close up that the three strips are different sizes...sorry!  I didn't measure, I just cut.


6- I removed the protective paper and stuck the piece of acrylic to the back side of a ruler...of course it can be stuck to the back of most anything you want to add to your 3 ring binder.


And here it is in my binder, ready when I need it!

Just FYI this is my SCRAPRACK Create and Carry Binder 

that I am loading with all my jewelry making tools, beads and findings.... So now I have a quick, ready to travel jewelry making kit!  So, I will definitely need a ruler!


Monday, February 9, 2015

WHAT HAS HAPPENED?!?!

Wow!  I have no idea what has happened to the design of my blog but I PROMISE it didn't look like this when I designed it!  And my bee isn't suppose to take up the whole page!  OH MERCY!!!

I will have to take a day and figure things out and try to get my nice little blog looking normal again.  PLEASE FORGIVE!!!

Wednesday, June 4, 2014

Well DER!!

Have you ever had one of those WELL DER! moments when you say, why didn't I think of this AGES AGO?!

That happened to me this week.  I just joined Costco last week and this week I bought some of the napkins pictured below... just the napkins, they didn't have the dispenser (???).  Of course you have to buy the smallest quantity they sell which will last a life time!  But that's OK, I neeeeeded them!


I am always in search of a napkin, or tissue, or something to use with my "arts" and I am way too lazy to go off in search for it in another part of my house so THIS is my answer!!!  I found the dispenser on Amazon and got it in today.... :-)  HAPPY GIRL!!


I included my Caran d'Ache crayons in the picture so you can see what I will be using them for.  I have mentioned this in the past but I bought the Crayon Tower a while back to hold all my Caran d'ache crayons.... PERFECT!  And if you haven't tried these colors yet you can not imagine how wonderful they are.... probably my favorite "watercolor".  You just color it on and add water, beautiful.  I have linked to the largest package they sell but Amazon does carry smaller sets with fewer colors.  

I totally recommend all three things I have shown today.  I am pretty certain I am going to buy at least one more napkin dispenser for my car. :-)


Tuesday, May 13, 2014

Zoe in Jeans


Today's doll was all made pretty much from scratch... hair, clothes, shoes, and of course the glasses. I did start with the body from the Zoe #2 die/stamp set but it took some tweaking once I found the outfit I wanted to put on her.


Every piece, including the hair was hand drawn using a light box to make each part fit.  After I got her all put together I noticed her legs looked all wrong... the bottoms looked way too fat for the thighs and hips, something you don't notice with dresses...so, I had to trim things down.

Monday, May 12, 2014

Looking Through Rose Colored Glasses

.
I wanted to hurry and get today's doll done so that I could test out an idea....  Glasses.  I saw a doll on Pinterest with glasses and I WANTED them!   No clue where she got them sooooo...

I have been on a major quest in search of glasses for my girls.  Yes, first I tried the obvious, just drawing them but I'm not so great at symestry anymore.... Heck, a straight line went out the door years ago....you'll notice there are no straight lines in any of my doodles.   I digress... guess what, there is no such thing "out there" that you can buy... No dies, no stickers, no brads.... Until now :-).  As always I had a "well der" moment... "You can make them yourself!"  So I did:


This is what they look like after I cut them out.... white then I hand color as desired.

I cut them out of white vinyl so that I can color them with any color, lense and frame.  The idea is to color each piece then layer the frame onto the lense (if you use one) then place it onto the doll before adding bangs.

If you would like some glasses that you can color yourself I will sell you 15 assorted pairs (including 15 frames/lenses) for $2.00 (FREE shipping).  These are ALL WHITE vinyl (I used alcohol pens and permanent ink pens to color mine) and are about .8" (fit the popular DIE CUT dolls ... not the stamped dolls)...click the "Buy Now" button below:


I used the doll and dress from this set:


I got the pad of paper from Hobby Lobby this weekend for only $4 ... it was the 6x6 version, not this oblong one.  I used the sheet of white polka dots on pink then put a black dot on every other fold of the dress to make it appear that I used two different papers.

 And the Hair (I drew the bangs in myself) from this set: 


The leggings and shoes are just colored directly onto the original white stamped/cut doll, no extra cutting...I do that when I'm in a hurry. What I usually do is place the clothes down onto the girl, without gluing it down, to see what needs to be colored flesh color and whatever (like the leggings). This time I had done a really bad job of cutting the foot so there was a big black line running through her foot...problem fixed by coloring the whole foot black and calling it boots. I then thought she needed some lacy socks so I just used a white pen and doodled those in.

All of the coloring was done with the Spectrum Noir pens.

Sunday, May 11, 2014

Doll-A-Day


I mentioned last week that I have a new favorite thing...paper dolls.... Julie Nutting's dolls specifically.   Well, I am going to do my best to make a doll a day but I'll be honest I tend to get bored really quick so we shall see.  I plan to post them every day but I wanted to do one quick "catch-up" post to cover May 1-10 since I do have 10 made so far:


I won't be showing any end results yet because I hope to use them on customized name plates eventually so they are just hanging out loose in the meantime.  I plan to be more descriptive for future dies but not so much for the ones above.

One thing I just noticed, dolls 1-3 were all done using patterned paper but the rest were all done on white then colored and doodled on.

Today's doll:


For day 11 I have a version of "Doll With Ruffled Dress". (?? Must be before she started giving each stamp an actual girl name)... Very simple.  I just stamped her on white then colored the body parts and the orange ruffle with Spectrum Noir pens. I then stamped the dress onto a sheet from 


By the way, the 6x6 (or smaller) pads are the best for this kind of stuff because the patterns are the right scale.


Monday, May 5, 2014

Prima Paper Doll Play

My new favorite thing! .... THIS week :-).  Would you believe that I just recently discovered Prima dolls by Julie Nutting ?!  Truth.  But, I'm actually glad I waited until the dies for some came out because I don't really have the patience to do much fussy cutting.
So, last week I bought all three die sets currently available and this weekend I played paper dolls!  WHAT FUN!
Stamps and Dies Used: Here are the stamps that go with each set:
And, thankfully, there is a die for each piece.


I love having all three sets because you can mix and match some of the pieces, not all, but some....like the hair and some of the clothes.
I got tired of switching the stamps around on my acrylic blocks so I found two long blocks + one smaller block and put all the stamps on them so that now all I need to do is ink up all the stamps I want to use at once. 
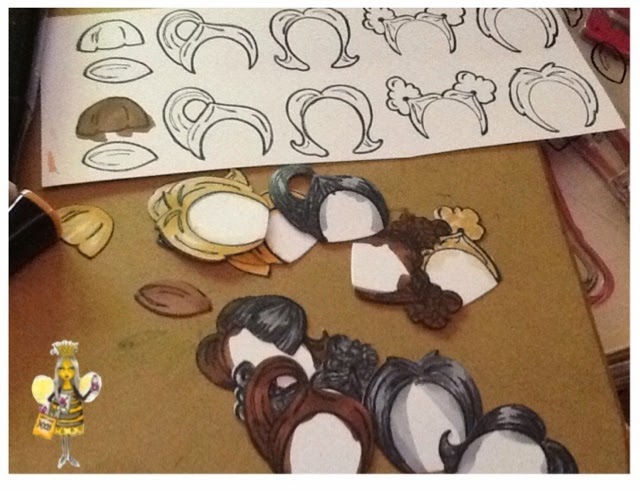
I have decided that I want to make lots of dolls for a project idea I have for later on in the year so I started mass producing elements:
But back to the dolls I made this weekend... on the 1st, 2nd and 5th I used patterned paper but on the rest I just doodled on and colored with my Spectrum Noir markers... my alternative to crazy expensive Copic Markers.  I'm afraid my iPad photo didn't do the markers justice though,  the colors are not showing through like the originals.  OK, and to be honest I didn't do such a great job of coloring the hair either. I LOVE! LOVE! playing with these sets!  The only thing that I was a bit disappointed with was the fact that she uses the same two bangs in each set.  I did a little bit of extra cutting on the 2nd girl myself.  Honestly though, the ability to modify them yourself is what makes it fun.  I will definitely buy any new sets she comes up with. FUN! FUN! FUN! Markers Used: I am showing all the different sets of Spectrum Noir available...you would have to buy all sets to have all the colors...which, of course, I just had to have


They are very much like Copics except for the number of available colors and the price of course.  Thankfully I never got on the Copic bandwagon because I couldn't justify the expense in my own mind... paying between $1-$2 per marker makes more sense to me. Papers Used: I used plain white cardstock (random no name)and two different paper pads. I'm sorry but I can't find the cover to the flowers on but the paper for dolls 1 and 5 came from:


OH! and the white/black polka dot stocking were made with washi tape... I accidentally drew on her let so I need to cover the mistake up so I just covered some cardstock with the tape then cut the legs out again with the die....easy fix, happy solution.

Wednesday, February 12, 2014

Scor Tape Test or Something Old, Something New... TIME TO USE IT!

I think I have decided to try and continue my "OK You Just HAD To Have It, Now USE IT!" Challenge

Today I used two new dies:


- paper that was collecting dust (for at least two years) 

and my new 6" Scor Tape

OH! and some glitter like this only gold:

Gotta say I LOVE THE TAPE!!!  So much so that I ordered the 1/8" and 1/4" today.  I thought I could just cut strips from the 6" wide but that isn't all that easy...forget cutting a good straight line!

OK, so I wanted to test using intricate dies and glitter with the tape so this is what I did:

1. I took a 2" strip of tape and covered one side of it with the glitter, making it a piece of glitter tape.

2. Cut the butterfly from that strip of just tape w/ backing.
   - problem, the die cuts super fine lines (which was part of the test for me)...unfortunately the backing paper came off and left just the glue/glitter part in the die so I had to pull it off and of course it stretched ...bad.  I think it would have been fine if I'd used a more solid die, like a solid butterfly, or heart, or something... but I still wanted to use what I had cut so I stuck it to the back of my phone:

I figure this will be a good test of its durability because I have used my phone and rubbed on it all day and that glitter is on there good!

3 - I still wanted a glitter butterfly for a card so this time I stuck some of the glittered tape down onto a piece of scrap card stock and cut it out along with the word:


The results:

It is hard to tell from the picture but both the butterfly and the "thanks" are perfect, solid glitter.  So pretty. One thing that I was worried about was that the glue would gug up my die, but not at all, it came out without leaving anything behind.  Test was a success.

The "OK, You Just HAD To Have It, Now USE IT!" Challenge

.
Archivers is about 5 miles from my house so it was always my "go-to" when I wanted something that Michael's and Joanne's didn't have.  Well, they are closing... and everything in the store is now 75% off!!!  YES!!  I stocked up with tons of stuff I really don't need...but...it was 75% off!

One of the things I bought was this set of Nestabilities:


I have to say, I didn't love it, but it was only $6.50.  I decided yesterday to force myself to use them and doodle on the cutouts.  Of course I used some of my empty boxes.

I was actually pretty pleased with what I could do just using the shape for inspiration...I started with the obvious, frames for whatever, but then I decided to try flowers....I don't usually do very well with flowers but these were simple.  Start by drawing some circles in the middle then draw the pedals out from the circle to each of the scallops.


And then I stuck them down and drew leaves and stems on the page:


A more Pinterest Friendly version:


Another thing I did yesterday was to buy more Sakura markers...AGAIN.  I can't tell you how many times I have bought these pens and they fall into the black hole that follows me.  THIS TIME I'm going to try and be better and keep up with them by leaving them in the package they came in!  Well, I don't know about you but all those little size numbers mean absolutely nothing to me so I decided to make some examples:


NOW I can tell!


Monday, February 3, 2014

Doodle Ready ATC Cards From LC Boxes

.
I haven't mentioned this yet but, I started Weight Watchers (again) on January 1st. I only mention this because I have eaten at least one Lean Cuisine every day since and I can't bear to toss the boxes!  That's good, FREE, white cardstock!  So they are my first "go-to" cardstock when using all my new dies.  This week I cut out lots rounded corner cards (about ATC size) using a Sizzix die, that I can use for doodling and/or adding bits and pieces that I have piling up... like the leaf below and the stamped doghouse on the card below... I just like doodling on something that size because any larger blank white paper intimidates me... I figure anyone can fill up this much white space, right?


After I got several cards done (doodled on) I decided that I wanted to hang them together but I didn't want to punch a hole in the top, just in case I decided I wanted to use them for something later.  Sooooo, I punched out a fancy little piece using Spellbinders, Parisian Accents (seen in the middle of samples below).


I only added glue to the back so I could easily remove it without messing up the front of the card... 

I'm showing you a close up of this next card because I love the gingko leaf.  I made that by putting aluminum tape to the front of a piece of box then cut it out...the die has built in embossing lines.  Love it.


Below is a  quick card I made using one of my cards... quick quick because the work was already done.


Tuesday, January 28, 2014

Learning the Hard Way!

I made this card ALL WRONG!  See those little dark dots on it?  Well, those are smashed "crystals"!! (who knew they were plastic and they could be made to be so flat?!)   Lesson learned, don't run them through a die cutter!  The problem was I ran the blank cardstock through the machine just so I could see a new embossing folder, then I added the crystals, very cute.... but then it all went a muck,  I decided that I wanted to add a window using a Spellbinders scalloped oval ... mistake!  But, live and learn.  I guess I could have peeled them off and added more but I decided to go the cheap route and just added some Stickles on top of each, along with adding it to all of the dots inside the diamonds.  Unfortunately, you can't see any of that :-(  it really does add a cute little sparkle to the card.


Linked to:

Monday, January 27, 2014

Tim Holtz's Brick Wall Die

It all started with this die:

It is a Tim Holtz die from Sizzix.  LOVE IT! LOVE IT!  

BUT....
when you cut it out it is the martyr between the bricks which makes perfect sense but not so much when you try to use it... not to me anyway.  The problem is, if you just lay it down on paper it will be higher than the actual brick, and that isn't "real"... not in the South anyway... here the brick sticks out further than the martyr.  Problem... so, I look all over the web in search of something someone else might have done to fix the problem...nothing...not even on Tim's personal blog.  Well yesterday I had a "suddenly, WELL DUH!" moment.  I cut the die out of a Lean Cuisine box (have lots of those these days) and used it like you would use any stencil you buy.  I don't have any of the paste that is made for 3-d embossing so I improvised with what I had: (a LOT of)

I slathered it on nice and thick with my finger, then instead of smoothing it out with something I patted it to make it rough, more brick like.  Then because I have no patience I took my heat gun to it and that caused it to bubble up a bit, even better! 

The two pictures below are just WEIRD because they make it look exactly opposite of what it actually is!  

- The very top of the first picture is one I made with just paper and in this picture it actually looks that I would want it to look!...but not in real life.

- the middle is just the "stencil" right after I used the tile adhesive and it gives the appearance of raised bricks!  NOT!...just the opposite

- the bottom was the PERFECT results but in the picture the bricks look recessed... ???


Closer:

Now.... how I used it and pictures that maybe show it a little bit better:


Well heck, not really ... you'll just have to take my word for it I guess, the bricks stick out about 1/8".

The solid strip of "concrete" across the top is actually 1 bump cut from a piece of corrugated paper and colored gray.

OH! and I colored the bricks with BIC permanent markers.

Products Used (with links to where to buy them):


Get a playlist! Standalone player Get Ringtones