I am so sorry for the TERRIBLE layout of this blog! It was actually pretty nice but one day everything went all amuck ??? No clue what happened....and since I don't really post here anymore I haven't bothered to figure it out. SORRY!!!

Thursday, April 14, 2011

Check! Check! Check!


(letters from Lettering Delights...I'm telling ya, you need to go check them out!  I just got about $60 worth FREE today because they hit 10,000 fans on FB. Click on Ad above this blog
But, back to the


I "handed over" the last of the order for the church!  YES!!!  Actually, I took it to my friend's house (she is the event's coordinator at the church) ...Yup, 1:50 AM.  She had left her car unlocked for me.

250 mirrors, 50 sets of magnets, 75 tiles


75 more tiles for a total of 150


 1700 business cards!!!  OK, so can I just say right here... 1700 is a VERY LARGE number!  I don't know why it didn't intimidate me at first but it takes 4EVER to do 1700 of anything!

This is the first batch of about 500...that it took me THREE DAYS to make!!!

TIME FOR A REDESIGN!!!  Let the printer do most of the work! 1200 more...


And, last but not least... my "door prize"...kinda hokie, but my printer stopped working just as I was about to come up with some cute! (At 1:00 this morning!) ARGH!!!


OH!  And I just filed an extension on my taxes ("I'll think about that tomorrow") so I am a ...
HAPPY HAPPY GIRL!!!  

Time to be creative again!

Wednesday, April 13, 2011

IT WORKED!!! WHOOHOO!!!

I AM SO EXCITED!!!  My first Spoonflower fabric came today!!!  YES!!  OK, can I just say, I now know where all my $$ will be going!  I LOVE IT!
It arrived in a THIN envelope...
This is it!  FANTASTIC!  

Are you wondering what the heck it is?  Well, each individual picture is a door pillow top.  (soon to be found in your local internet store)... I had to also include the back piece for the "non-black/white" ones because I would never be able to match the front fabric, it was just some I came up with.... see the "tie-dye" look (finished pillow below), I made that with just a few clicks of "watercolor brushes" in PSE...SIMPLE! SIMPLE!
And a pillow is born.....

See... door pillow, just a little over one hour from getting it. The pillow didn't take that long, I just did other things before I started. 


Sunday, April 10, 2011

Never Go Empty Handed

That's my motto...I like to bring a little something when I'm meeting someone for lunch (if I haven't seen them for a while)....I brought these:

Today I took a break from convention "stuff" and meet some friends from my days at AT&T.  WHAT FUN!  I loved seeing them and catching up.
Jackie and Robin
Mary... doesn't like pictures!  But she reminded me that I could show the ring I made for her YEARS ago!  Hard to see but its sterling silver band with a cross cut out on the top.  Yes, jewelry making is in my past too :-)


Anyway, I got up early this morning and put personalized labels on 3 different plastic amber bottles for each. (Bottles available HERE)


The label looks yellow and blue but it is actual kraft (same color as burlap bag) and blue


There is one for lotion, one for dish-washing liquid and one for foaming soap. I then placed each gift in a little burlap bag that I added a gusset bottom to so they would stand up.  I know, they just scream for a bow around the neck but I didn't think that was so practical...with all that liquid going in and out of each.

  (Bottles available HERE)

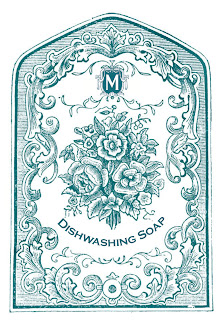
I used the following label from The Graphics Fairy:
Original

Modified


The initial is a font called MFC Monarchy Initials found HERE.

Tuesday, April 5, 2011

Monday, March 28, 2011

Steps to Making a Door Pillow x 60!

AKA : Procrastination 101.... Take Pictures and Blog About It to Avoid Doing It!

Pre- Pillow Construction:

Create 2 versions of the pattern, one for each machine
Pre- cut all fabric and ribbon
Steps to Sewing:
1.Hoop Lining Fabric
2. Sew pillow fabric down to lining fabric/ stop machine


 3. Place and sew yellow felt down (1st appliqué) / stop machine

4. Trim felt to stitch line


6 Load onto 2nd machine and let it stitch checkered outline and butterfly placement 


Somewhere along the line, the machine stops on its own 2 or 3 times and demands attention!  (broken thread, cutter not working, WHATEVER)

7. Stop machine and change it over to the other machine.

8 Stitch green down and inside wings (10 mins) ...stop machine

9. Cut around butterfly


10. Load back into machine 2 and stitch body of butterfly/ stop machine

11.  Add back fabric and stitch.
12. Trim around pillow
13. Turn pillow right side out.
14. Pin ribbons into holes
15. Stitch 1/8"  around the outside edge leaving opening undone.  This is an extra step, but it allows us to machine stitch the hole left for stuffing later, instead of having to hand-stitch it...


16. Stuff
17. Stitch closed
18 Add bling


REPEAT... 59 more times!!!


The moral of this story:
I'm NOT CHARGING ENOUGH!!!!

Saturday, March 26, 2011

How to Make SHARP Corners on Pillows


AKA... Old Dog - New Trick!


Work began today on making 60 door pillows for the Pastor's Wives Dinner at next month's conference.  This was a HAPPY surprise order but boy WHAT have I gotten myself into?!


This is the final product:

I designed it using a modified version of the weekend logo:

I will show more pictures of the process later, now I want to show you something I just learned tonight!  

My friend Andrea came over to give me a hand with the final steps of the pillow...the turning, stuffing, stitching closed part.    

The very first words out of her mouth were, "No you did this wrong" 

!  !  !  !  !  !  !  !  !

"WHAT?!!!  Hey!  I'm the one with 4 years of high school Home Ec. and 4 years of college Home Ec.  I have a TEACHING DEGREE IN HOME EC!!!  What do you mean I did it wrong!?!"

This is how we were taught to make a good corner:  
DON'T DO IT THIS WAY!
Trim all seams to 1/4", taper at the corners, cut across the corner then turn and push it out with a pointed something.  ..Kinda like this:...only I haven't trimmed the seams here...just angled to the point then cut across.

WRONG!!!  And she proved it to me!  I was shocked! 

How to do it correctly:
1.  All seams should be about .5"... do not taper or cut across the corner!

2. Stick your pointer finger inside the corner before turning


3. Fold the side seam in toward the pillow and hold with your thumb and the finger that is still inside the pillow


4. Fold the top seam down over the side seam and hold 


5. With both fingers still "together", pull the corner through the hole you left for turning... The point will be PERFECT without poking anything into it!


6. Continue these steps until all four corners are turned.


Oh!  I also found out tonight that Andrea's mother owned a Professional Pillow Making Business so Andrea made pillows for years!!!!


She wins....


Pin It

............


CHECK THIS OUT!!!  Have you found Blitsy yet?
Up to 60% off of art/craft supplies...new sale every Monday/ Wednesday/ Friday!  AMAZING!


I just bought $48 worth and it only cost me shipping!
You GOTTA try this! AMAZING!

Thursday, March 10, 2011

PASSWORD ALERT!

Oh MY GOODNESS! Oh MY GOODNESS!!!  I now have a new obsession!  I have been on the ColourLovers site since I got up this morning!  It all started when I woke up with this idea for a pattern.  I call it "Broken Hearts Club"  get it?  I know...CORNY!!!


Anyway, something I thought about yesterday, as I was signing up for one of these "free tools", was that I needed to be careful with the passwords.  The thought occurred to me that I, like most folks I expect, tend to use the same username and password on as many sites as I can, just so I can remember them...there are just so many to remember!  And then I thought, that all these "free" sites could, if they wanted to, go to sites like PayPal and test the username/password combinations we so freely give them.  BAM!  They have us!  

So, the moral of that story is: CHANGE YOUR PASSWORDS!!!  I started making the password something like "stripes" if it a package to create stripes... or some other key phrase for that site.

OK, I'm off to find some lunch...it is 2:45 here and I haven't eaten today!  HUNGRY!


Get a playlist! Standalone player Get Ringtones