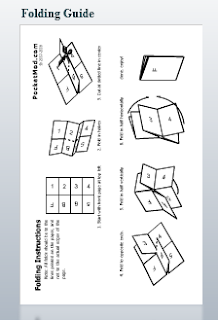
I have had this link on my "To Do" list from the beginning and I finally got around to using it. It is for the PocketMod. I know you have seen them around... the little booklet made with one sheet of paper.
Yes, you can make them without help but this guy has taken it to a new level! He has created different templates (calendars, lists, grids, blank pages for you to add text) that you can just drag and drop into the order that you want them then he turns them in the direction they need to go in...All you need to do, after deciding what goes where, is print that baby! Well, ok, you then have to fold it...he has instructions for that.
I have to make 48 little somethings for a women's retreat so this was PERFECT. I made mine using mostly the address template and one page with the weekend theme and scripture. (It is printed on parchment because that's all I had in my office at the time)
After I cut and folded the sheet I added a little twist to it by stitching it down onto a piece of cardstock.
I did what I usually do and didn't measure the card stock first, I just laid the folded booklet down so that it was about 1/8" from the edges then cut all the way cross the width of a regular sheet of card stock....so the resulting piece of card stock was 4.5"x8.5". I then opened the "booklet" up to the center and stitched it down the middle so that there would be 1/8" all around three edges and a large amount to the right because I wanted it to overlap when folded:
 Next I made a slip on sleeve out of a contrasting card stock, embellished and slipped it on.
  Last week I had started making little puffed hearts and decided it was gonna take too long to make as many as I needed so I used the already cut felt to embellish the booklets.
Here is another one:
For this one I printed red on red to get the stripes then printed two copies of a gate from Graphic Fairy. I then cut a strip through the middle of one of the copies to use as the slip-on sleeve. I glued brass flowers for the handles.
The bag I used to prop the little booklets up for the pictures is the "gift wrap" for the Yarn Stash book I'm giving my friend for her BD...we are having lunch today (only three weeks late) so I grabbed bits and pieces around the room and this is it. (this is one reason why I don't clean up! the bag, hearts and ribbon were all in different places in my living room and I just decided I liked the combo... it seems I've got a theme going :-).


Adorable Nancy....I will have to try this now. I love making little books...Of course I only have 10 thumbs, but that doesn't stop me from trying. Have a great day!!
ReplyDeleteThe good news is, even people with 10 thumbs can do this one... EASY! EASY! the folding kinda messes with your brain a little bit but if your brain can get it all your thumbs should be fine. Another plus is that it is super fast...love that!
ReplyDeleteHey Nancy,
ReplyDeletethanks so much for my butter container! You are the best!
Blessings, Deb
Hi Deb... you are so welcome! Glad it got to you in one piece. N.
ReplyDelete